Everything you need to run your clinic's day on RevisitMD, from adding your first patient to sending a broadcast to your whole patient list.
Your dashboard
What needs your attention today, at a glance.
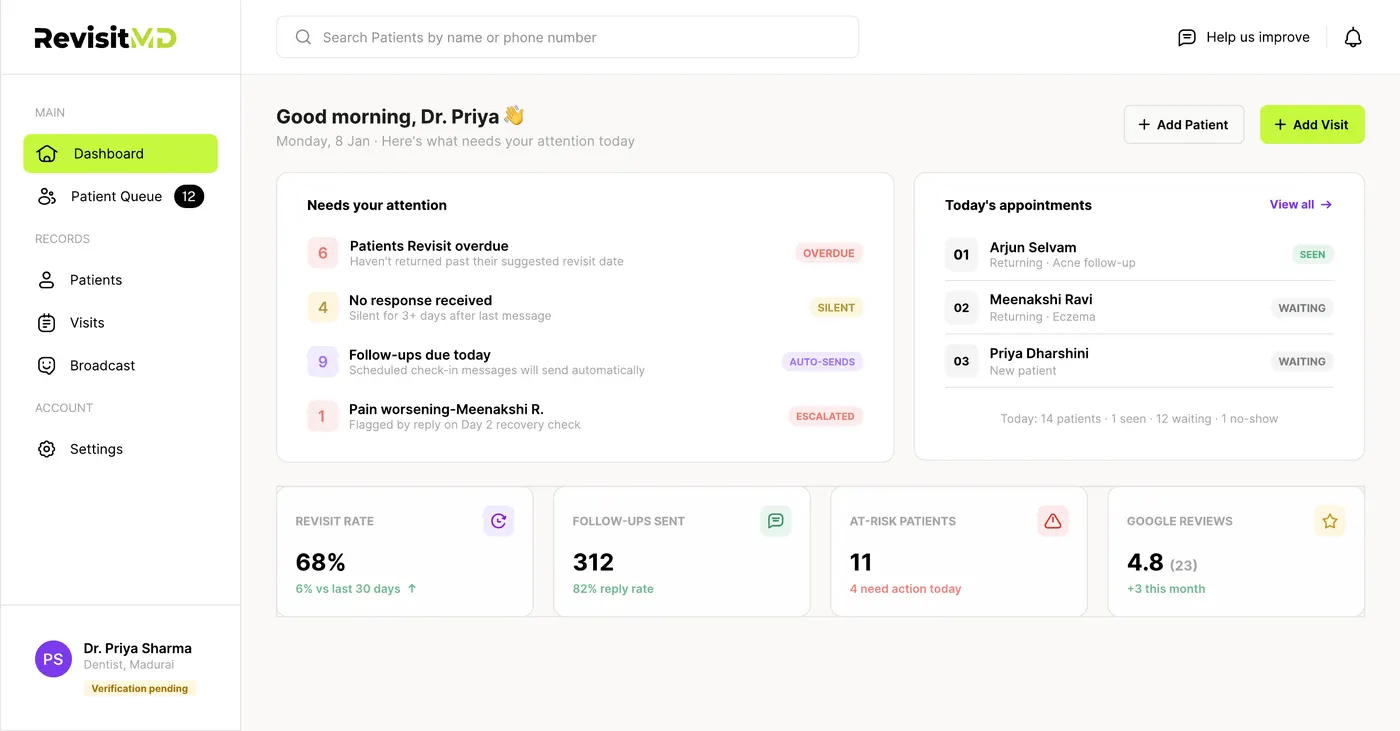
The Dashboard is where your day starts. It surfaces patients who need attention, patients overdue for a revisit, patients who haven't responded in a few days, follow-ups due today, and anyone whose reply flagged worsening symptoms, alongside today's appointments and your clinic's revisit rate, follow-ups sent, at-risk patients, and Google review score.
Use Add Patient or Add Visit at the top right to jump straight into either flow.
Each item under "Needs your attention" links straight to the patient it's about.
Dashboard: what needs your attention today, and how your clinic is trending.
Adding a patient
Name and phone number is all you need to start.
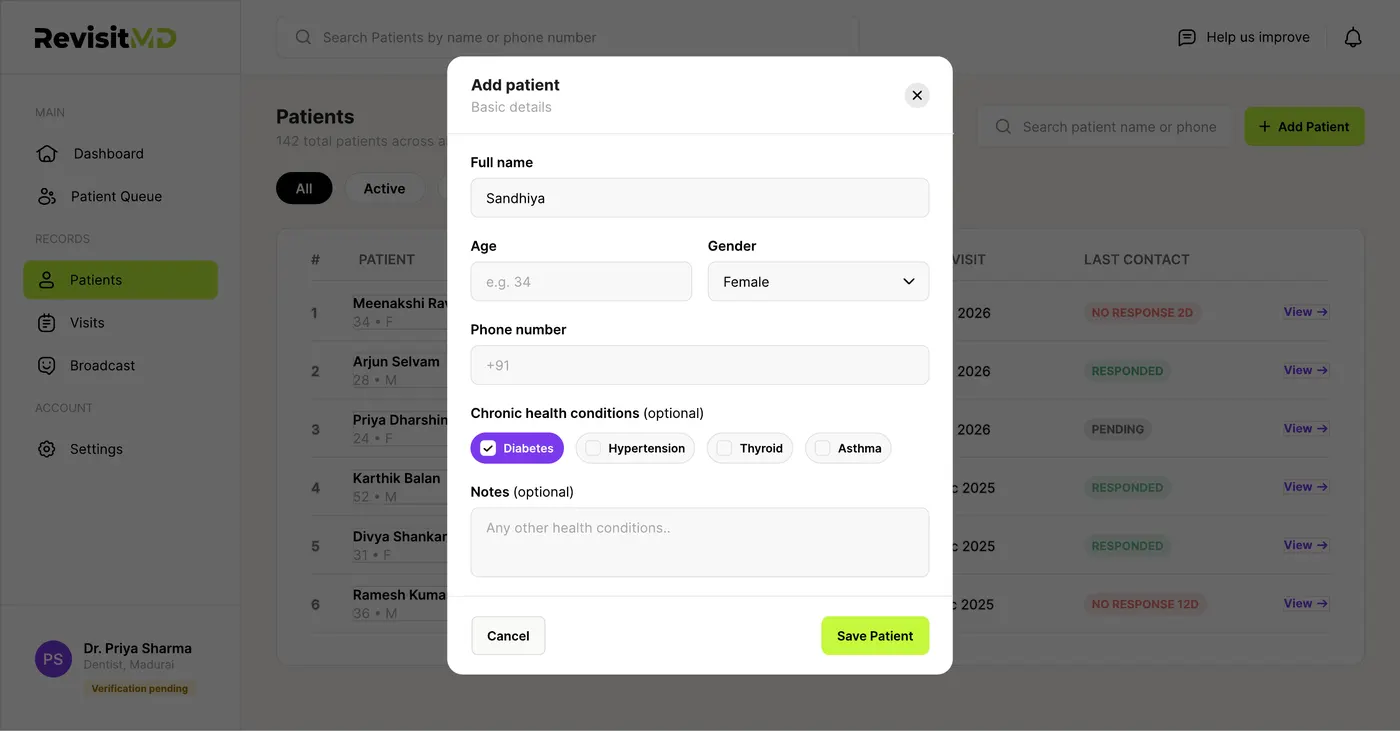
From Patients, click Add Patient. Fill in their full name, age, gender, and phone number, and optionally flag chronic conditions (diabetes, hypertension, thyroid, asthma) and add notes. Save, and they're in your patient list, ready for their first visit.
Adding a patient: basic details, plus optional chronic conditions and notes.
Starting a new visit
A four-step flow: patient, visit details, medications, preview.
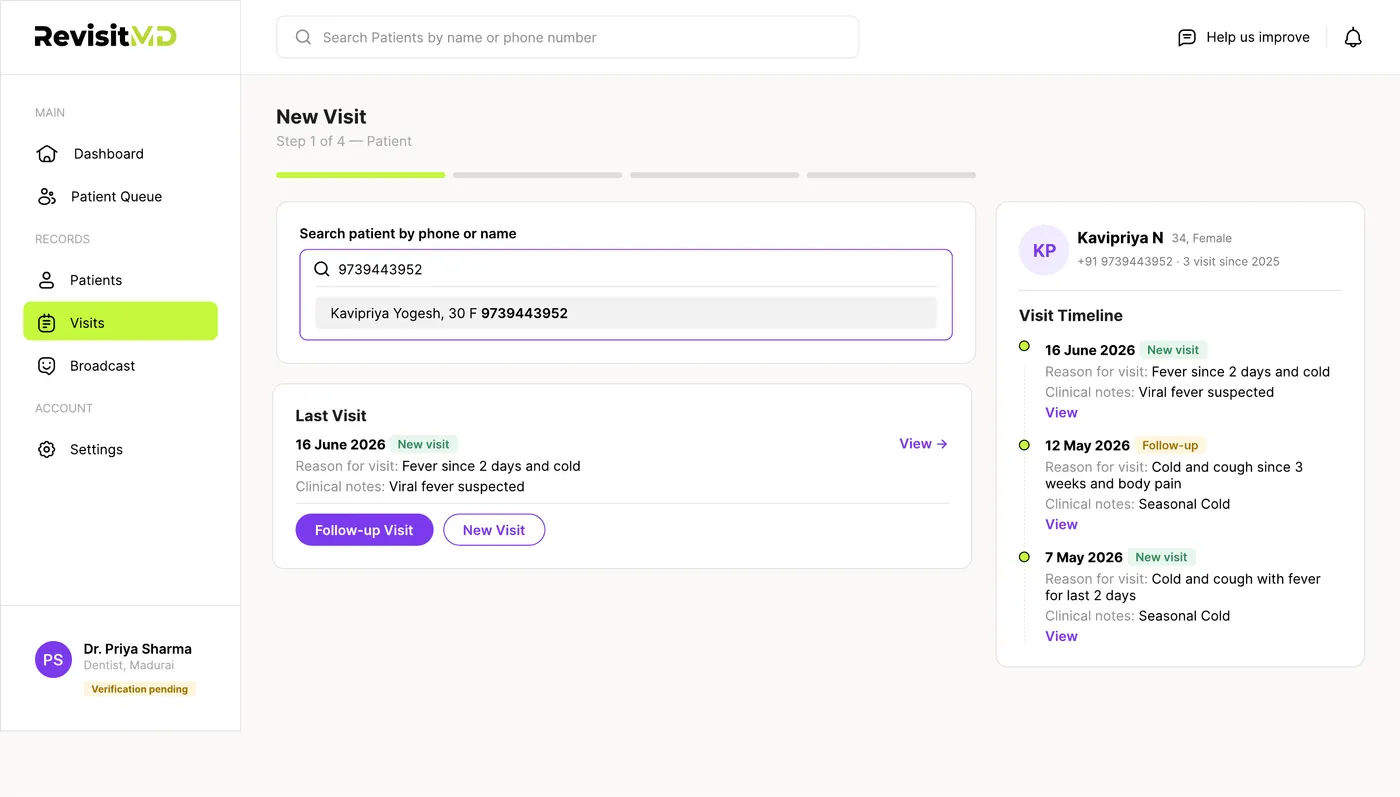
Click New Visit from Visits or the Dashboard. RevisitMD walks you through four steps for every consultation:
Step 1, Patient: search by phone or name. An existing patient shows their last visit and full visit timeline right there, so you have context before you start.
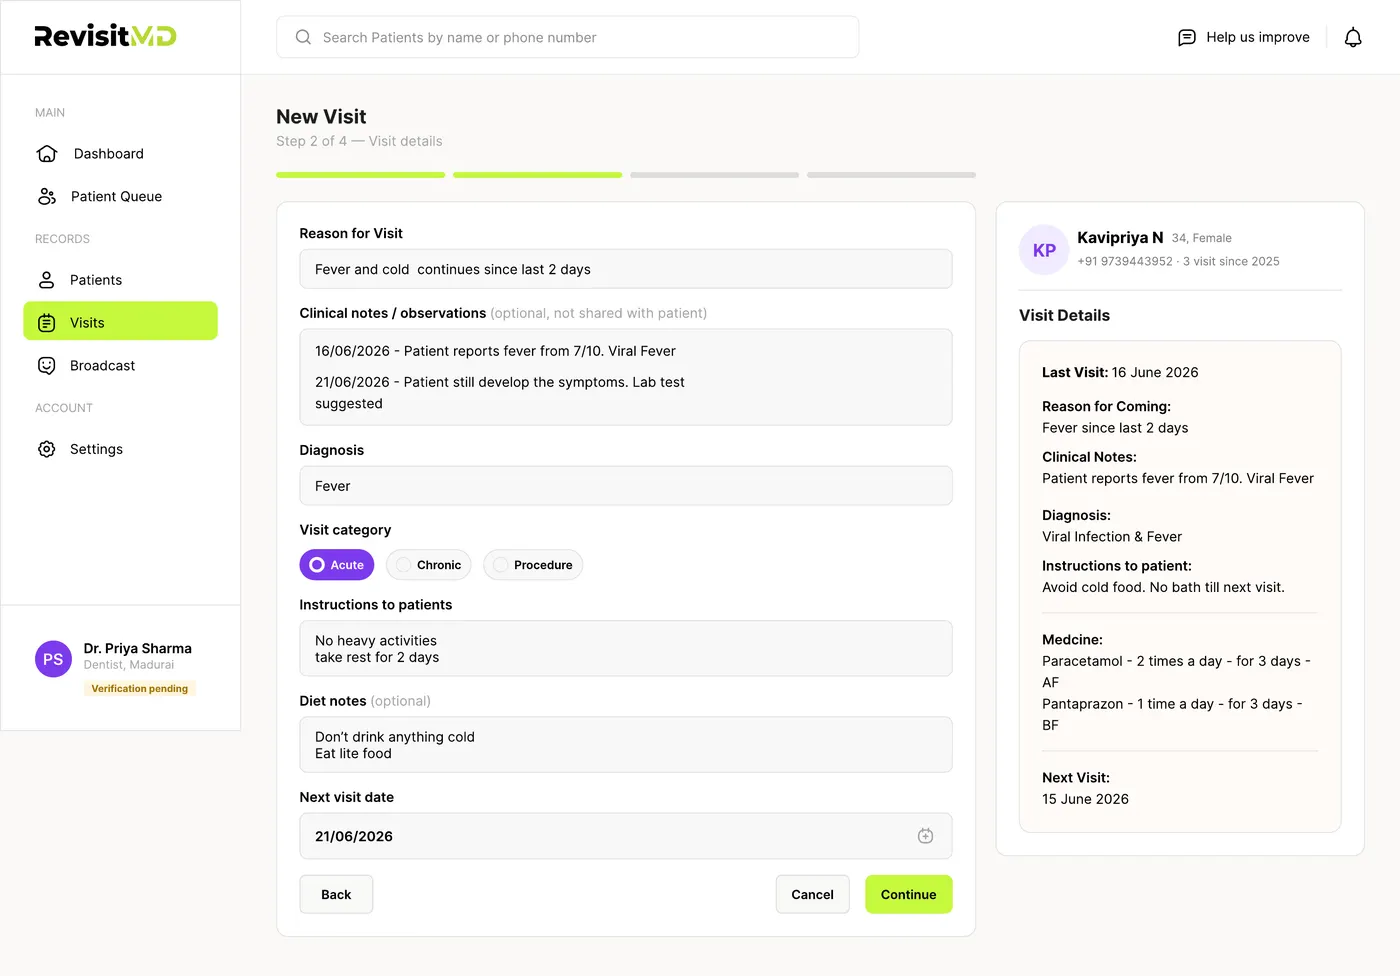
Step 2, Visit details: reason for the visit, clinical notes, diagnosis, a visit category (Acute, Chronic, or Procedure), instructions to the patient, diet notes, and the next visit date.
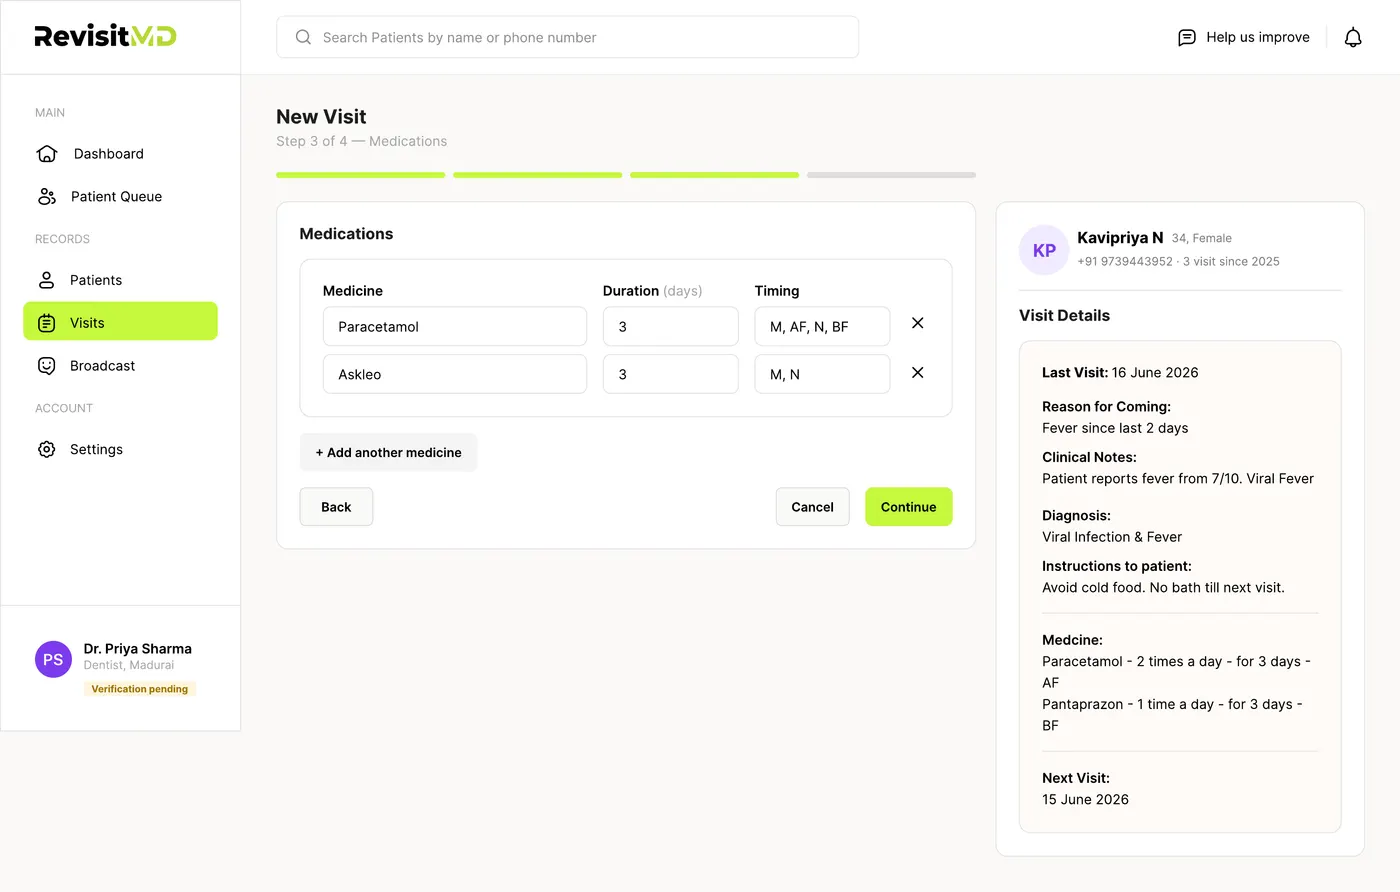
Step 3, Medications: add each medicine with its duration and timing (morning, afternoon, night, before or after food). Add as many as the visit needs.
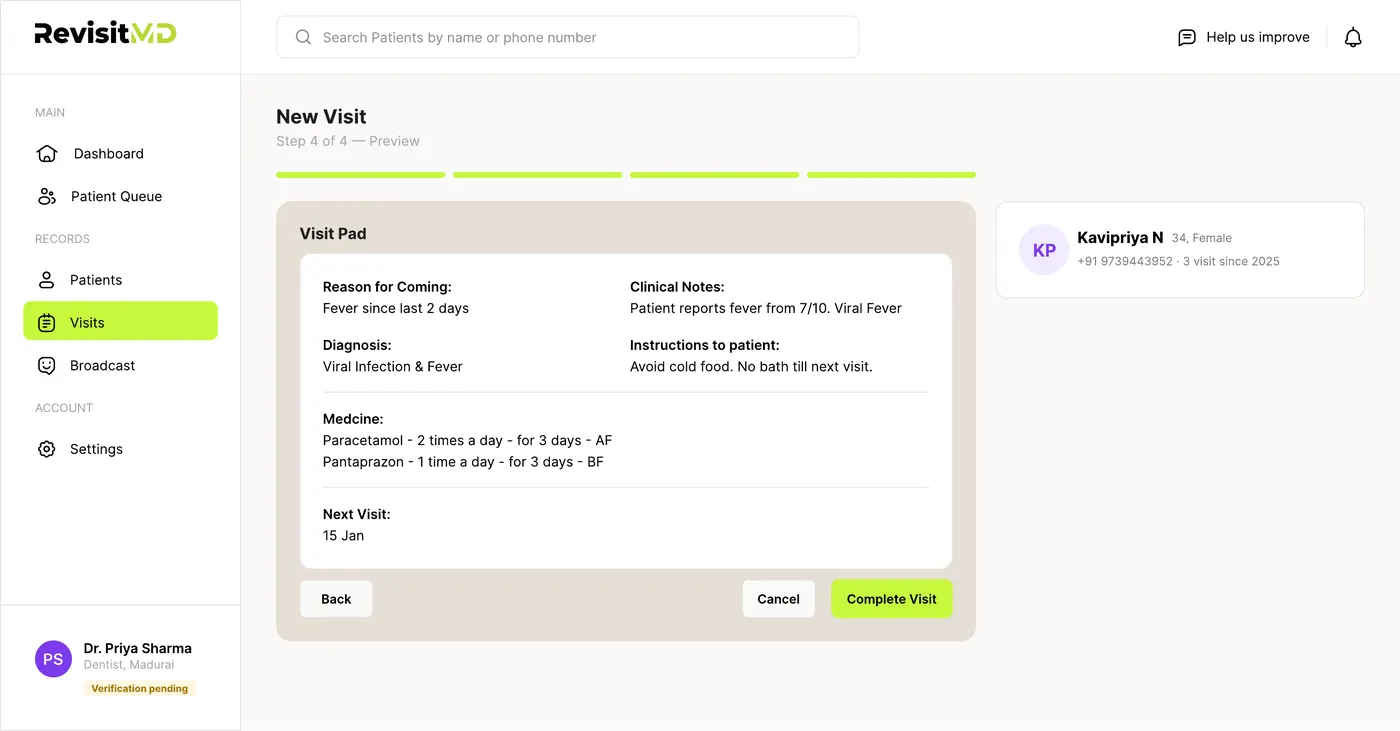
Step 4, Preview: review the full visit pad and click Complete Visit. The patient gets their instructions and follow-up automatically.
Step 1: find the patient, see their history instantly.Step 2: reason, diagnosis, and instructions for this visit.Step 3: medicines, duration, and timing.Step 4: preview everything, then Complete Visit.
Visit records and messages
Every completed visit, its follow-up status, and the WhatsApp thread, in one place.
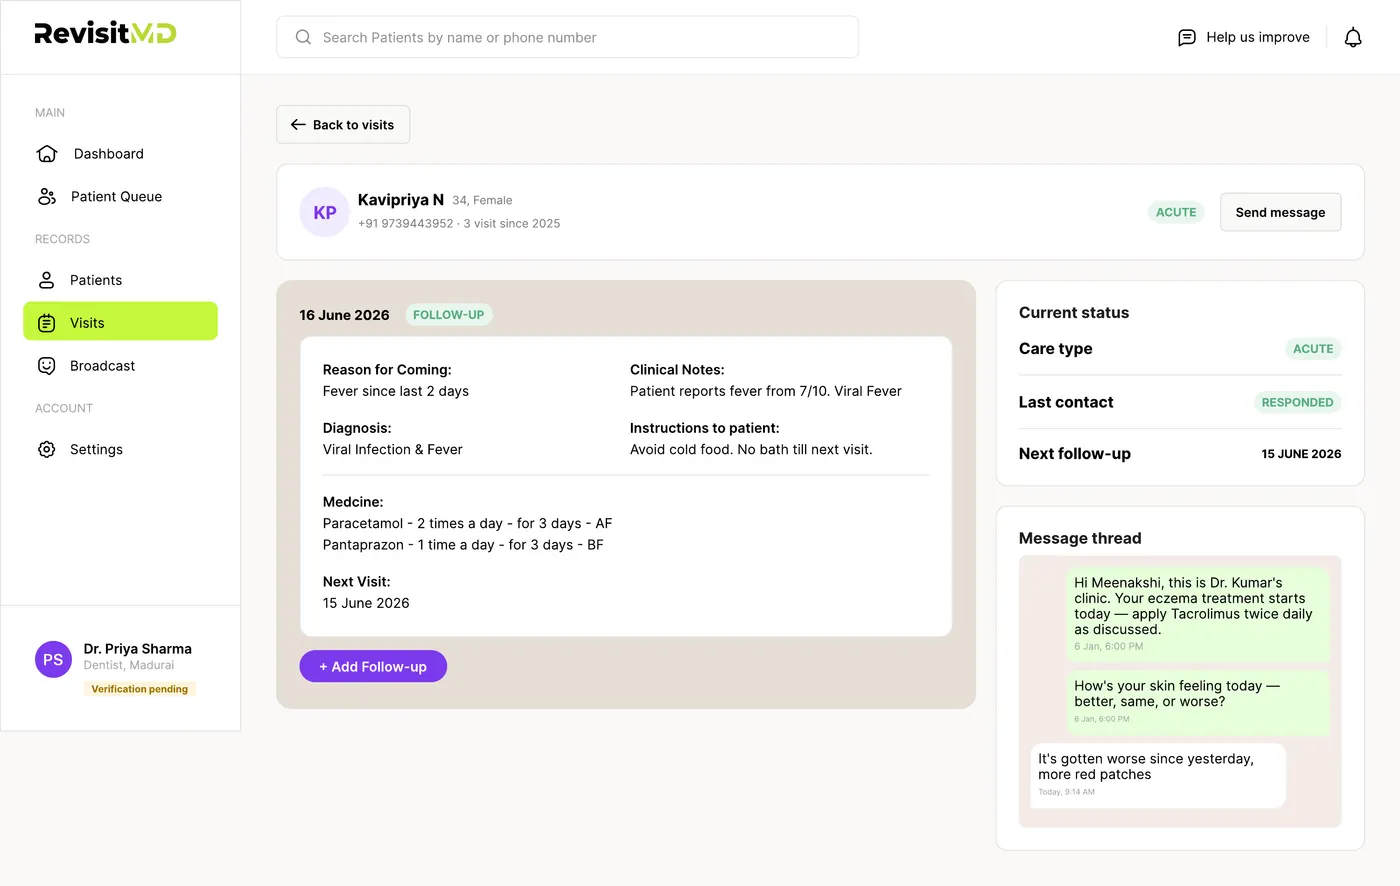
Open any visit to see its current status (care type, last contact, next follow-up) alongside the actual WhatsApp message thread with that patient. Click Add Follow-up to log a new check-in against the same visit without starting from scratch.
A visit record: status, history, and the message thread together.
All visits at a glance
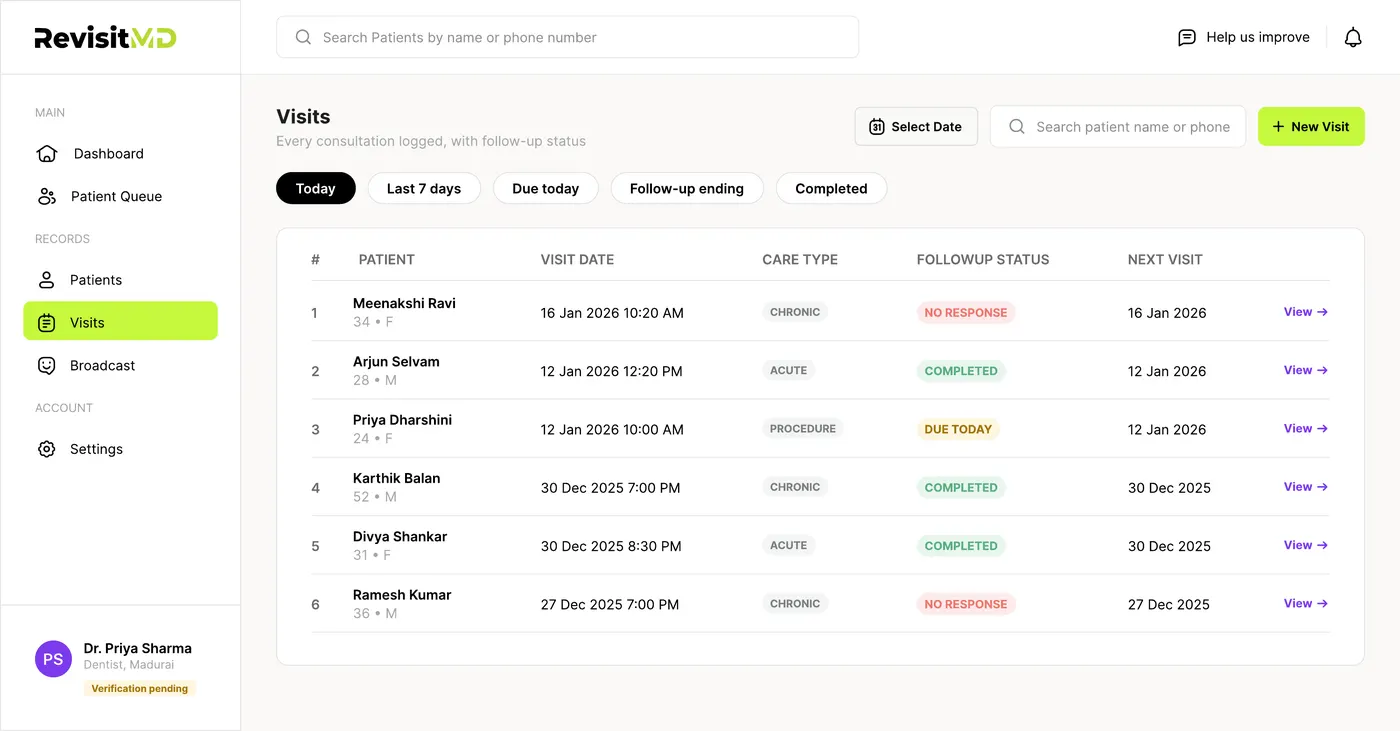
Filter by Today, Last 7 days, Due today, Follow-up ending, or Completed.
The Visits page lists every consultation your clinic has logged, with follow-up status at a glance, so you always know who's overdue and who's on track.
Visits: every consultation, with follow-up status at a glance.
Sending a broadcast Coming soon
One WhatsApp message to a group of patients at once.
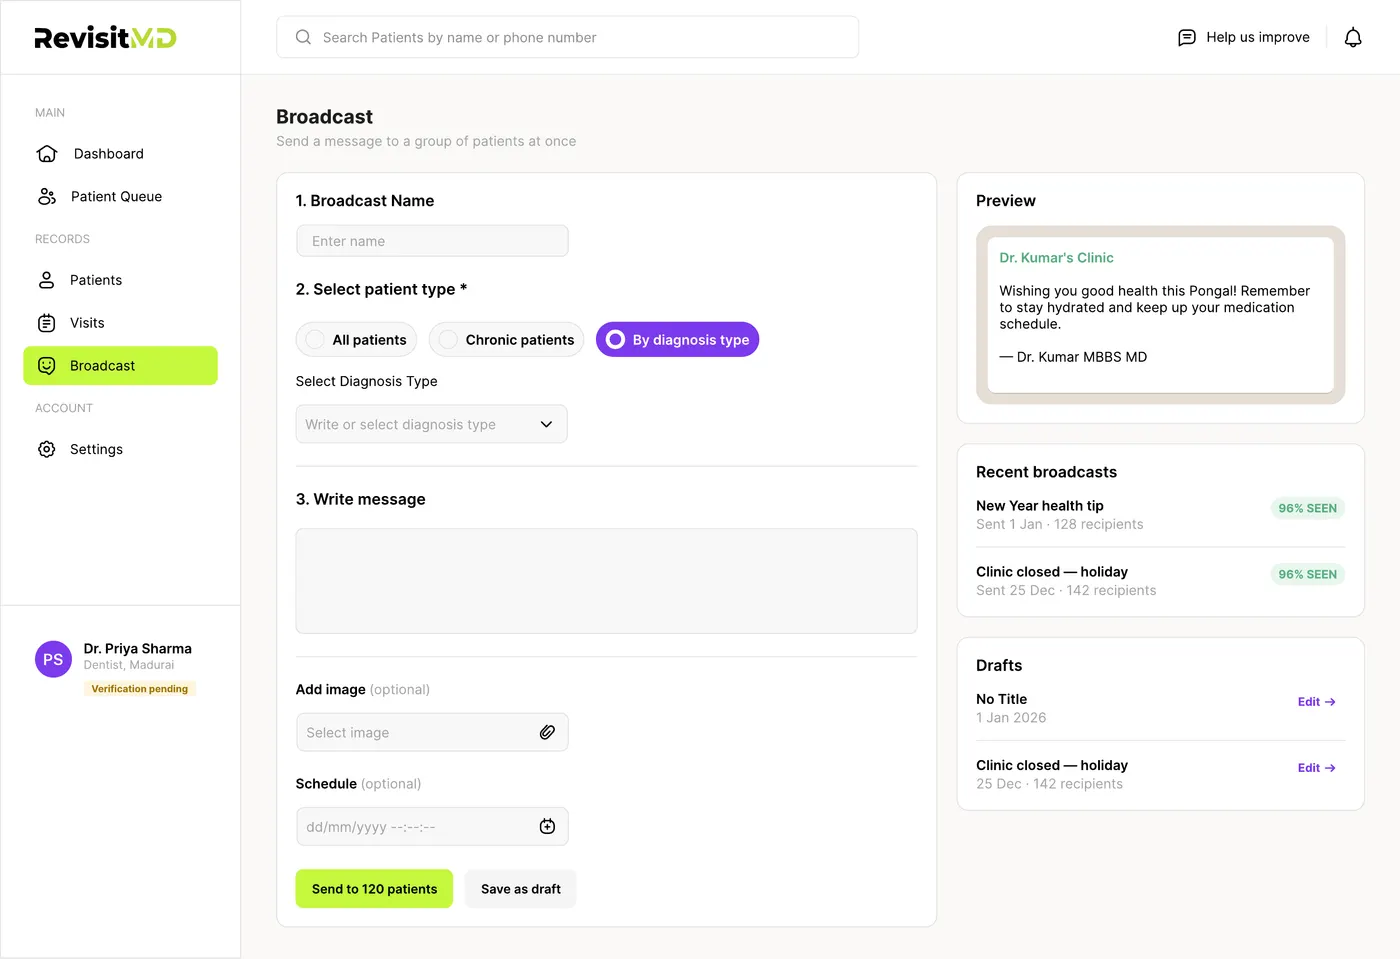
From Broadcast, name your message, choose who receives it (all patients, chronic patients, or by diagnosis type), write the message, and optionally attach an image or schedule it for later. The preview panel shows exactly what patients will see before you send.
Broadcast: pick your audience, write once, send to everyone at once.
Team and access
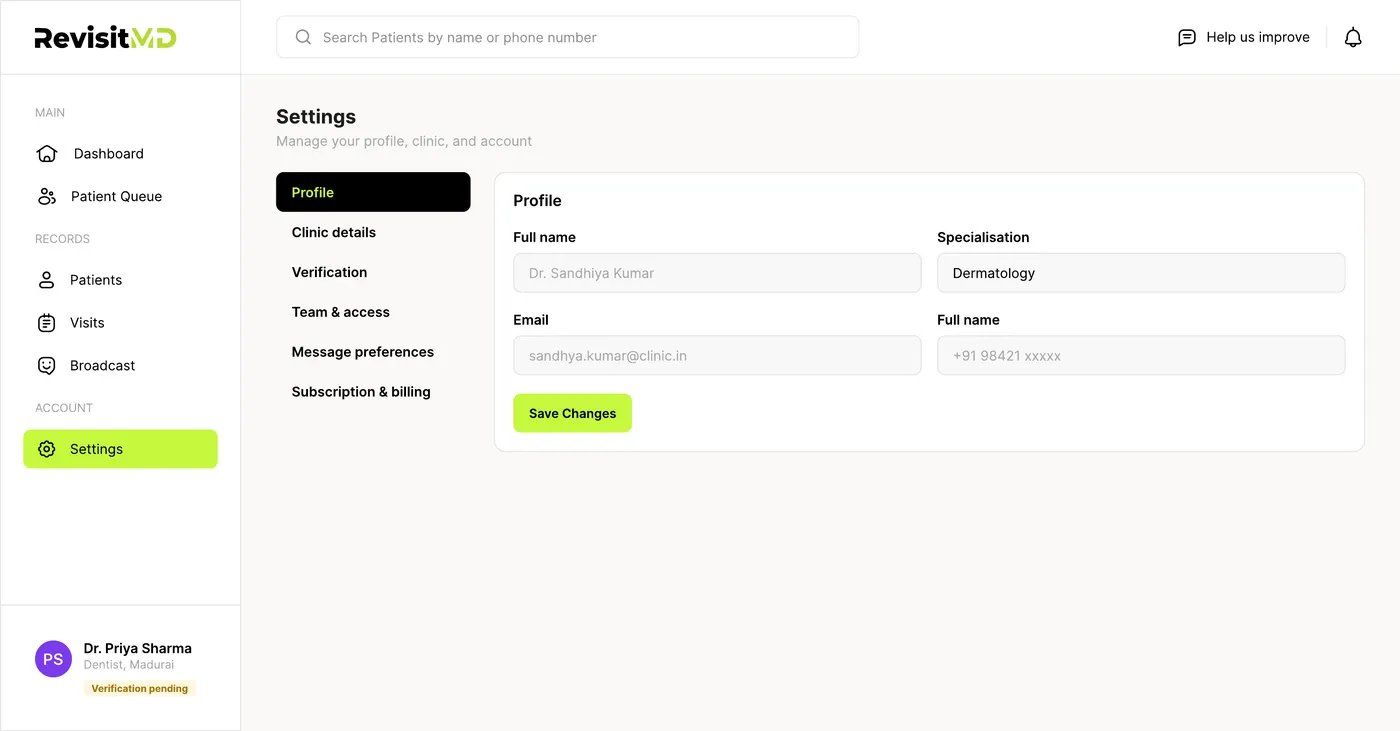
Invite doctors and reception staff from Settings.
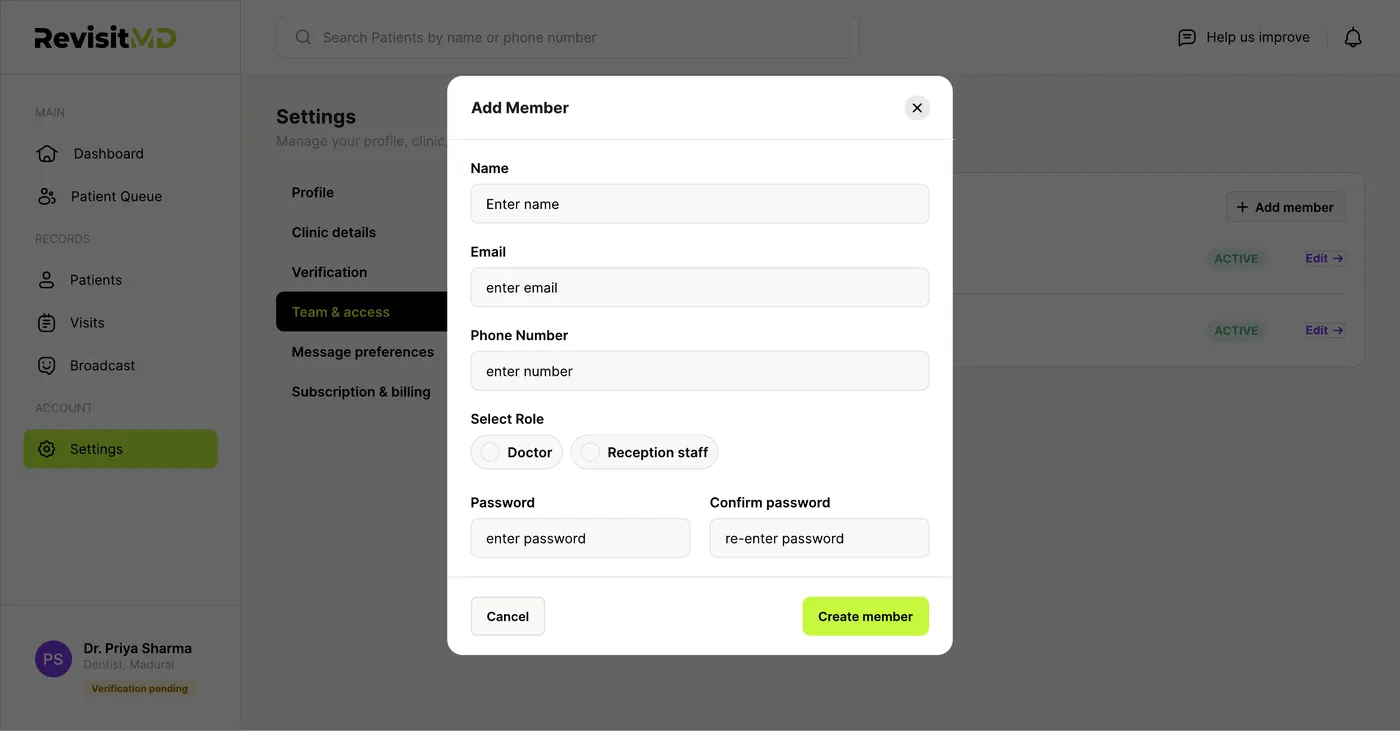
Under Settings > Team & access, you can see everyone with access to your clinic's RevisitMD account. Click Add member to invite a doctor or a receptionist: enter their name, email, phone number, and role, set a password, and they're in.
Team & access: who has access, and what role they hold.Adding a doctor or receptionist to your clinic.
Getting help
Still stuck on something? We're happy to help directly.